
Step-by-Step Guide: How to Lay Concrete Slabs on Soil Like a Pro
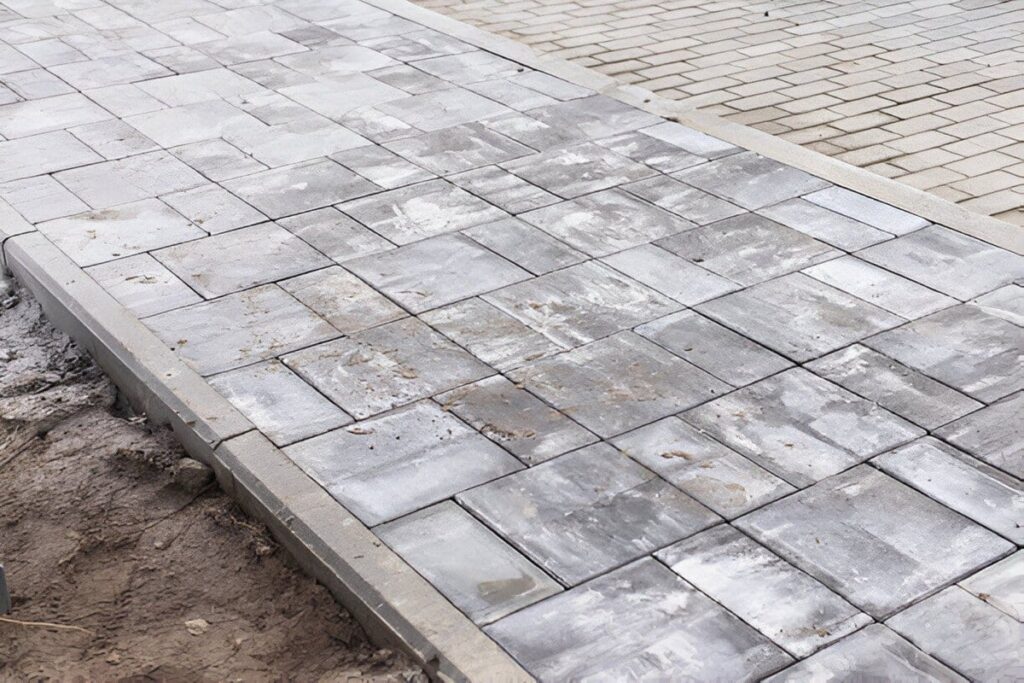
Concrete slabs remain a popular choice for outdoor spaces thanks to their versatility and enduring strength. Homeowners often appreciate the clean lines and modern aesthetic they bring to gardens and patios. A concrete surface provides a reliable foundation that handles heavy foot traffic and varying weather conditions with ease. Whether it’s a quiet garden path or a busy patio used for gatherings, concrete slabs maintain their appearance without requiring constant upkeep.
Another benefit of concrete is its flexibility in design. It can be paired with a variety of landscaping features, including decorative edging and stone chippings, to create a cohesive and inviting outdoor area. Many choose concrete for its affordability compared to natural stone while still delivering a polished and professional finish. This balance between practicality and style makes it an ideal option for transforming exterior spaces.
Planning before laying slabs
Proper planning is essential when considering how to lay slabs on soil. Start by measuring the chosen area carefully, as this determines how many slabs will be needed and helps avoid unexpected gaps or awkward cuts. Take time to decide on the shape and layout that best complements the garden’s existing features, ensuring the design feels integrated rather than forced. Detailed measurements also make the installation process more efficient and help in ordering the right amount of materials.
Drainage is another crucial factor to consider before starting. Poor drainage can lead to pooling water, which may damage the slabs or create slippery surfaces. Ensuring the ground has a gentle slope away from the property helps water flow freely and prevents future issues. Additionally, checking the soil type and stability ensures the base will support the slabs properly, preventing them from shifting or sinking over time.
Tools and materials needed
Having the correct tools and materials on hand makes the process smoother and ensures professional-looking results. Essential tools include a spade for digging, a spirit level for checking alignment, a rubber mallet for gentle adjustments, and a tape measure for accuracy. A wheelbarrow, rake, and a hand tamper or plate compactor also prove helpful during preparation and installation stages.
For materials, a good supply of sharp sand or a mortar mix will serve as a bedding layer, providing a firm yet adjustable surface for each slab. A sub-base material like crushed stone or hardcore is vital for extra support, especially in larger or high-traffic areas. Jointing compound or kiln-dried sand will be needed to fill gaps between slabs once laid. Gloves, knee pads, and sturdy footwear help keep the installer comfortable and safe throughout the project.
Step-by-Step Guide: How to Lay Concrete Slabs on Soil Like a Pro

Why choose concrete slabs for garden and patio spaces?
Concrete slabs remain a popular choice for outdoor spaces thanks to their versatility and enduring strength. Homeowners often appreciate the clean lines and modern aesthetic they bring to gardens and patios. A concrete surface provides a reliable foundation that handles heavy foot traffic and varying weather conditions with ease. Whether it’s a quiet garden path or a busy patio used for gatherings, concrete slabs maintain their appearance without requiring constant upkeep.
Another benefit of concrete is its flexibility in design. It can be paired with a variety of landscaping features, including decorative edging and stone chippings, to create a cohesive and inviting outdoor area. Many choose concrete for its affordability compared to natural stone while still delivering a polished and professional finish. This balance between practicality and style makes it an ideal option for transforming exterior spaces.
Planning before laying slabs
Proper planning is essential when considering how to lay slabs on soil. Start by measuring the chosen area carefully, as this determines how many slabs will be needed and helps avoid unexpected gaps or awkward cuts. Take time to decide on the shape and layout that best complements the garden’s existing features, ensuring the design feels integrated rather than forced. Detailed measurements also make the installation process more efficient and help in ordering the right amount of materials.
Drainage is another crucial factor to consider before starting. Poor drainage can lead to pooling water, which may damage the slabs or create slippery surfaces. Ensuring the ground has a gentle slope away from the property helps water flow freely and prevents future issues. Additionally, checking the soil type and stability ensures the base will support the slabs properly, preventing them from shifting or sinking over time.
Tools and materials needed
Having the correct tools and materials on hand makes the process smoother and ensures professional-looking results. Essential tools include a spade for digging, a spirit level for checking alignment, a rubber mallet for gentle adjustments, and a tape measure for accuracy. A wheelbarrow, rake, and a hand tamper or plate compactor also prove helpful during preparation and installation stages.
For materials, a good supply of sharp sand or a mortar mix will serve as a bedding layer, providing a firm yet adjustable surface for each slab. A sub-base material like crushed stone or hardcore is vital for extra support, especially in larger or high-traffic areas. Jointing compound or kiln-dried sand will be needed to fill gaps between slabs once laid. Gloves, knee pads, and sturdy footwear help keep the installer comfortable and safe throughout the project.
Choosing the right slab style for your space
Selecting the right style of slab transforms an ordinary outdoor area into a personal retreat.Kandla Grey Indian Sandstoneis a popular choice for those looking to create a sophisticated yet natural look. Its subtle grey tones work beautifully in modern and traditional settings alike, providing a versatile foundation for garden furniture, decorative planters, or even a fire pit. Kandla Grey also offers excellent durability, making it a reliable option for high-traffic areas.
Sandstone Slabs, in general, bring warmth and texture to any space. Their unique variations in colour and pattern create a more organic feel, ideal for those aiming for a softer, more natural aesthetic. Garden Slabs, on the other hand, come in many shapes and finishes, giving homeowners plenty of creative freedom. Whether used to form a winding garden path or as the base for a secluded seating area, they help shape an inviting atmosphere that encourages outdoor relaxation.
Inspiration for finishing touches
Once the main slabs are laid, adding finishing touches can truly enhance the space. IncorporatingPatio Slab Ideas, such as mixing slab sizes or creating contrasting borders, adds visual interest and helps define different zones within the garden. Introducing decorative aggregates between the slabs or around the edges introduces texture and prevents soil erosion. Edging stones or cobbles can also provide a neat boundary that elevates the overall look.
Lighting is another way to bring character to an outdoor area. Subtle ground lights along a path or spotlights focused on feature plants create a welcoming ambiance after dark. Adding potted plants or raised beds can soften the space and tie it into the surrounding garden. Thoughtful accessories, like outdoor rugs or cushions, turn a patio into an extension of the home, making it a favourite spot for dining, reading, or entertaining guests.
Common mistakes to avoid
When learning how to lay slabs on soil, some common errors can undermine the final result. A frequent issue is neglecting to account for drainage, which can cause water to pool and lead to slipping hazards or slab movement. Always ensure the area has a slight slope away from buildings to guide water safely into the garden. Another mistake involves using the wrong type or insufficient depth of sub-base, which can cause slabs to shift over time.
Incorrect joint spacing or filling gaps poorly is another oversight that affects both appearance and stability. Gaps that are too wide or left unfilled allow weeds to grow and water to seep underneath, compromising the surface. Rushing through the levelling process often results in an uneven finish that is not only unsightly but also uncomfortable to walk on. Taking the time to check and adjust each slab during installation prevents many of these issues and contributes to a professional, long-lasting patio or path.
Design ideas for year-round enjoyment
Designing an outdoor space with concrete slabs opens up many opportunities to create areas that can be enjoyed throughout the seasons. A well-planned patio or path extends living space outdoors, offering a peaceful corner in summer and a sheltered retreat during cooler months. Adding a pergola or canopy over part of the slabbed area provides shade during hot days and some shelter from rain, allowing the space to stay functional all year.
Incorporating zones within the layout can enhance the versatility of the space. A section with a dining table and chairs can be complemented by a separate area with loungers or a fire pit, encouraging different uses throughout the day. Seasonal plants and moveable planters help keep the design fresh, as colours and textures can be updated throughout the year. By considering how the space will be used in each season, homeowners can enjoy their patio or garden path without it feeling static or neglected during winter.
Concrete slabs also make an ideal base for outdoor kitchens or barbecue areas. With the right layout, a garden can transform into an inviting social hub perfect for entertaining family and friends. Durable and easy to clean, concrete surfaces handle spills and stains better than many natural materials. Pairing slabs with weatherproof furniture and soft outdoor textiles helps create a warm and welcoming setting. Careful planning of lighting, from string lights to built-in spotlights, extends usability well into the evenings and colder months.
Now, here’s thefinal partto complete the blog.
Maintenance tips for long-lasting results
Keeping concrete slabs in good condition requires regular yet straightforward maintenance. Sweeping the surface often helps remove leaves, dirt, and other debris that can cause staining or encourage moss growth. For deeper cleaning, a gentle power wash or scrubbing with warm soapy water can restore the slabs’ original appearance without damaging the surface. Avoid harsh chemicals, as they might erode the finish or affect nearby plants.
Sealing the slabs adds an extra layer of protection against weather and stains, especially in high-traffic areas or under outdoor dining setups. Regular inspections allow any early signs of weed growth or movement to be addressed promptly, preventing small issues from becoming larger repairs. With these simple steps, concrete slabs maintain their clean, attractive look and continue to function effectively for many years.
Eco-friendly practices and sustainability considerations
As more homeowners prioritise sustainability, choosing environmentally friendly practices when learning how to lay slabs on soil can make a real difference. Opting for locally sourced materials, such as Kandla Grey Indian Sandstone or other Sandstone Slabs, helps reduce the environmental impact associated with long-distance transportation. Supporting local or regional suppliers not only cuts emissions but often guarantees better quality control and more consistent supply.
Reusing existing materials from the garden, like old bricks or reclaimed stones, introduces character while minimising waste. These can be repurposed as edging, decorative features, or stepping stones that blend seamlessly with new slabs. Installing permeable paving options, where possible, helps water drain naturally into the ground, reducing runoff and supporting healthier garden ecosystems. This consideration becomes particularly important in areas prone to heavy rainfall, as it helps prevent flooding and erosion.
Incorporating native plants and drought-resistant greenery around the slabbed area also supports biodiversity and conserves water. Adding rainwater collection systems or directing water runoff towards planted borders encourages natural irrigation and reduces dependence on mains supply. By taking these small but meaningful steps, homeowners can enjoy an outdoor space that not only looks beautiful but also aligns with environmentally conscious living.
Final thoughts
Learning how to lay slabs on soil opens the door to transforming garden and patio spaces in a cost-effective and rewarding way. From the sturdy foundation to the choice of styles like Kandla Grey Indian Sandstone or traditional Sandstone Slabs, every step contributes to a result that reflects personal taste and practical needs. Incorporating creativeGarden Slabdesigns and exploring Patio Slab Ideas further enhances outdoor living, offering a space to enjoy with minimal effort for years to come.
FAQs
Can I lay concrete slabs directly on soil without a sub-base?
No, it’s not recommended. A proper sub-base like crushed stone or hardcore provides stability and prevents slabs from sinking or shifting over time, especially in high-traffic areas.
How deep should I dig when preparing the ground for slabs?
Typically, you should dig about 150–200mm deep: 100mm for the sub-base, 30–50mm for the bedding layer, and room for the thickness of the slab. This ensures long-term durability and proper drainage.
Do I need to seal my concrete slabs after laying them?
Sealing is optional but beneficial. It adds protection against stains, moss, and weather damage—especially in dining or shaded areas. It also helps maintain the slabs’ appearance over time.
How do I make sure my slabs are level during installation?
Use a spirit level after placing each slab. Adjust with a rubber mallet and check alignment frequently to avoid uneven or wobbly surfaces later.
Can I reuse old slabs or materials when building a new patio?
Yes, reusing old slabs or materials like bricks and edging stones is eco-friendly and adds character. Just ensure they’re structurally sound and fit well with your new design.


0 comments on “Step-by-Step Guide: How to Lay Concrete Slabs on Soil Like a Pro”